Headshot Posing in 2026: Angles, Chin, Shoulders and Hands That Look Natural
A practical guide to headshot posing in 2026: why posing is geometry, where to put the camera, body angles from square to profile, the chin and jaw, the four classic portrait angles, hands and arms, eyes and expression, standing, sitting and leaning, posing different body types, directing other people, common mistakes and a two-minute check before you shoot.
ON THIS PAGE
#The Short Answer
| Element | The safe default | What it fixes |
|---|---|---|
| Camera height | At or a few centimetres above eye level, lens level | Nostril shots, wide jaws, looming posture |
| Body angle | About 45 degrees away from the camera | Flat, wide shoulders and a shapeless silhouette |
| Head turn | Back towards the lens after the body turns | Lost eye contact and a strained neck |
| Chin | Down a few degrees, forehead slightly forward | Double chin and a soft jaw line |
| Shoulders | Relaxed, one slightly lower than the other | Symmetry that reads as a passport photo |
| Hands | Doing something, or out of frame | Clasped hands, stiff fingers and hidden shoulders |
| Eyes | On the lens, at camera level | Looking down at the camera or past the viewer |
| Expression | Calm closed mouth, or a smile that reaches the eyes | A mouth that smiles while the eyes do not |
| Weight | On the back foot when standing | Locked knees and a stiff torso |
The rest of this article explains each row, the situations where the safe answer is wrong, and what to do with someone who insists they always look bad in photographs.
#Why Posing Is Mostly Geometry
#The camera flattens depth
A photograph takes a three-dimensional head and projects it onto a flat rectangle. Everything that gives a face its shape in real life - the distance from the ear to the nose, the curve of the cheekbone, the angle of the jaw - has to be reconstructed by the viewer from shading and from the outline. That is why the same face can look entirely different at two angles a few degrees apart: the projection changes which planes are visible and how much of the silhouette they occupy.
This is also why posing advice that sounds like a personality instruction rarely works. "Look confident" is not a direction; "turn your left shoulder back two centimetres" is. The second one changes the photograph, the first one changes nothing a camera can record.
#Two angles, not one
Almost every useful portrait pose is a combination of two independent angles: the angle of the body relative to the camera, and the angle of the face relative to the body. Change either one and the photograph changes, which is why there are so many poses and so few of them are actually needed.
The standard combination is a body turned away and a face turned back. That gives a narrow silhouette from the shoulders, a clear view of the face and eyes, and a slight tension in the neck that reads as alertness. Once you understand those two variables, you can invent poses instead of memorising them.
#Camera Height
#Eye level is the neutral default
The camera at the subject's eye level, with the lens pointing straight at the face, is the least distorted version of a portrait. The nose is not foreshortened, the forehead is not exaggerated and the jaw keeps its natural proportion. It is also the height at which people normally look at each other, which is why the result feels like a conversation rather than a photograph.
For a headshot this is almost always the right starting point. If you are using a phone, eye level usually means holding it slightly away from your body at the height of your own eyes, not at chest height with the lens tilted up.
#Slightly above eye level
A camera ten or fifteen centimetres above the eyes, still pointing horizontally rather than down, produces a subtle downward view of the face. It emphasises the cheekbones, keeps the jaw line visible and avoids the upward angle that widens the base of the nose. It is the height most portrait photographers settle on, and the reason is practical rather than fashionable.
The limit matters. Once the camera is well above the head and angled down, the forehead grows, the chin disappears and the subject looks small. That is a deliberate editorial look, not a headshot default.
#Below eye level
A camera below the chin looks up the nostrils, widens the jaw and puts the subject above the viewer in a way that reads as looming rather than confident. There are portraits that use it on purpose, usually for a dramatic or satirical effect, and there is almost no reason to use it for a professional headshot.
The most common version of this mistake is incidental: a laptop on a desk, a webcam on a monitor stand, or a phone propped up on a table. In each case the camera sits below the face and the photograph pays for it. Raising the camera is usually a five-second fix and it changes more than any editing tool.
Lens choice changes perspective only because it changes where the camera has to stand. A long lens does not flatten a face by itself; standing further away does. A wide lens does not enlarge a nose by itself; standing close does. So when a portrait looks distorted, the question is not which lens was used but where the camera was.
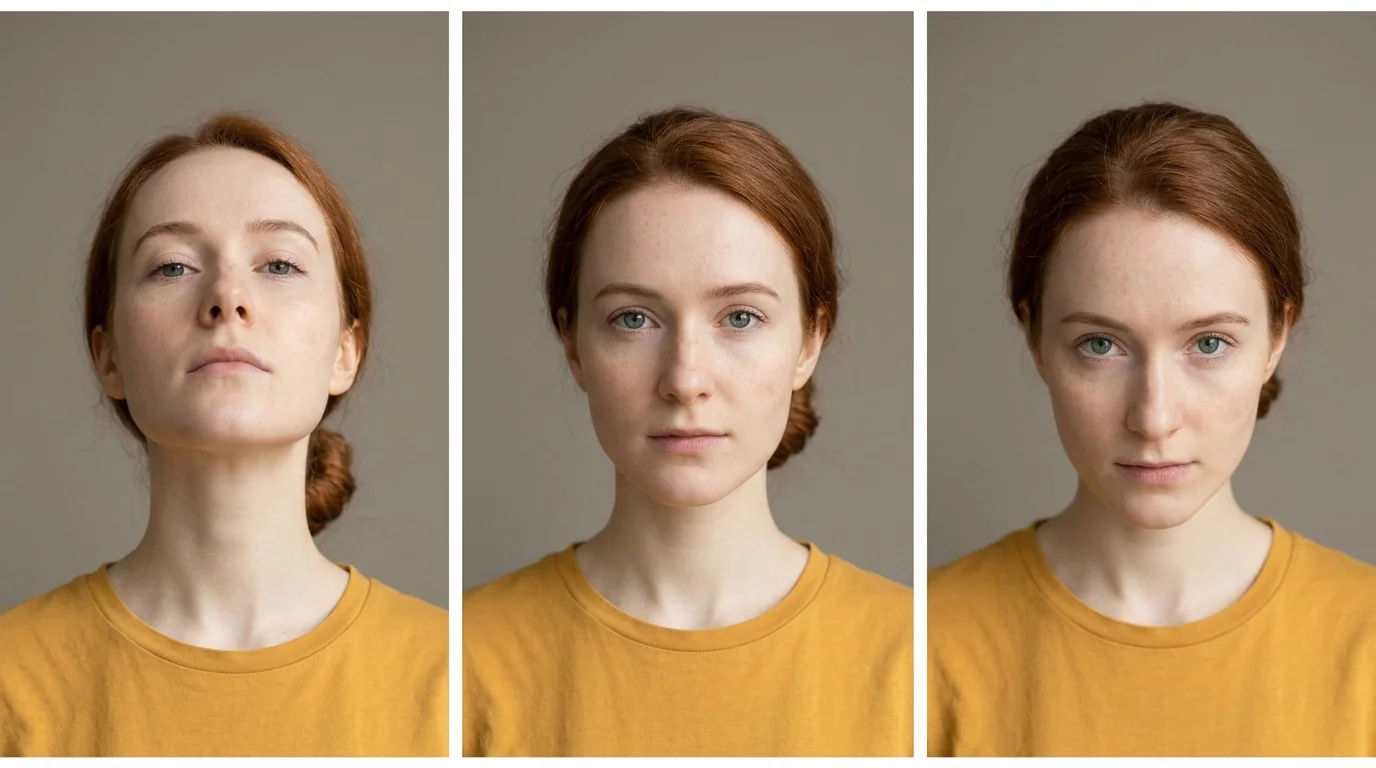
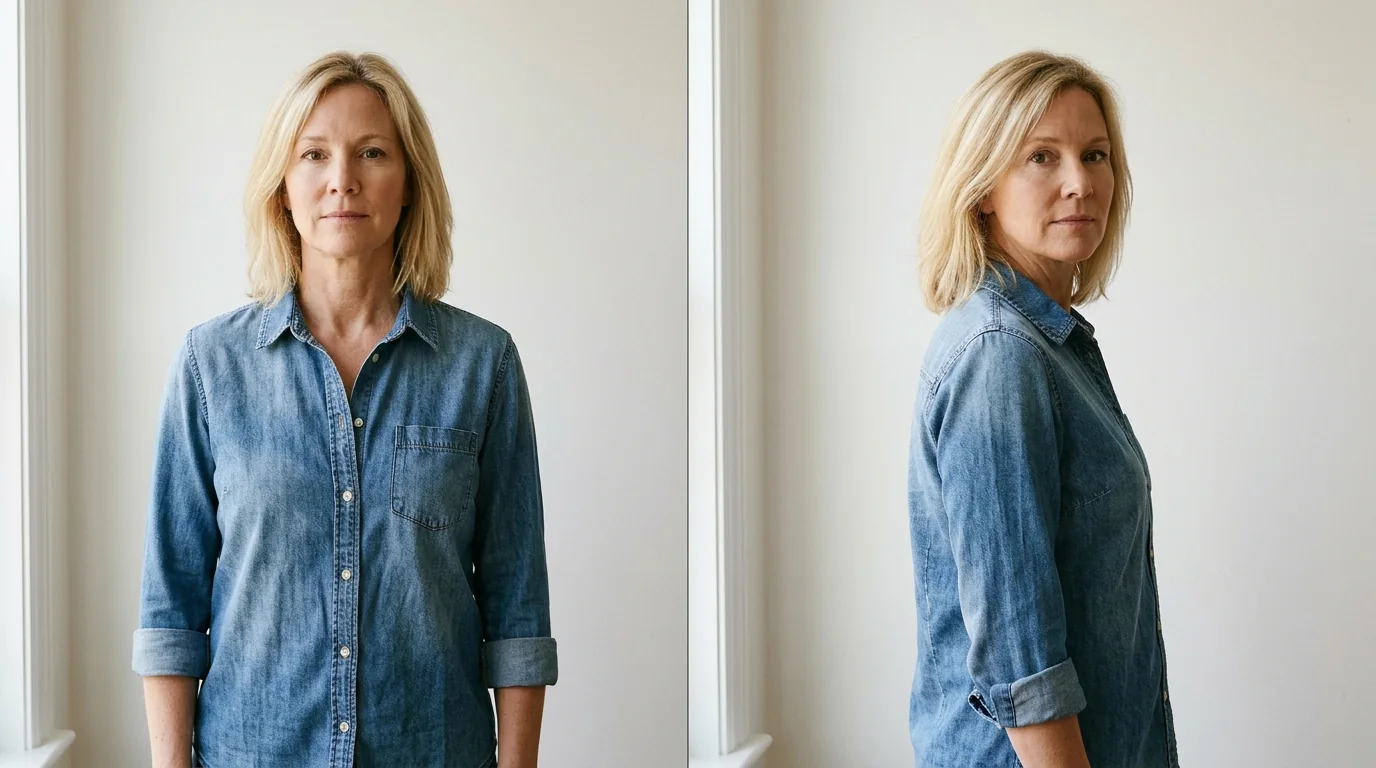
#The Body Angle
#Square to the lens
Shoulders parallel to the camera produce the widest possible silhouette and the flattest possible read. It is not automatically wrong - a square pose can look direct and formal, and it suits uniform portraits and some editorial work - but it leaves the body with no shape and puts all the emphasis on the face.
For most headshots, square shoulders are the pose you start from for half a second and then turn away from. If the subject is standing with both shoulders level and both arms hanging, the camera will record a rectangle.
#Forty-five degrees
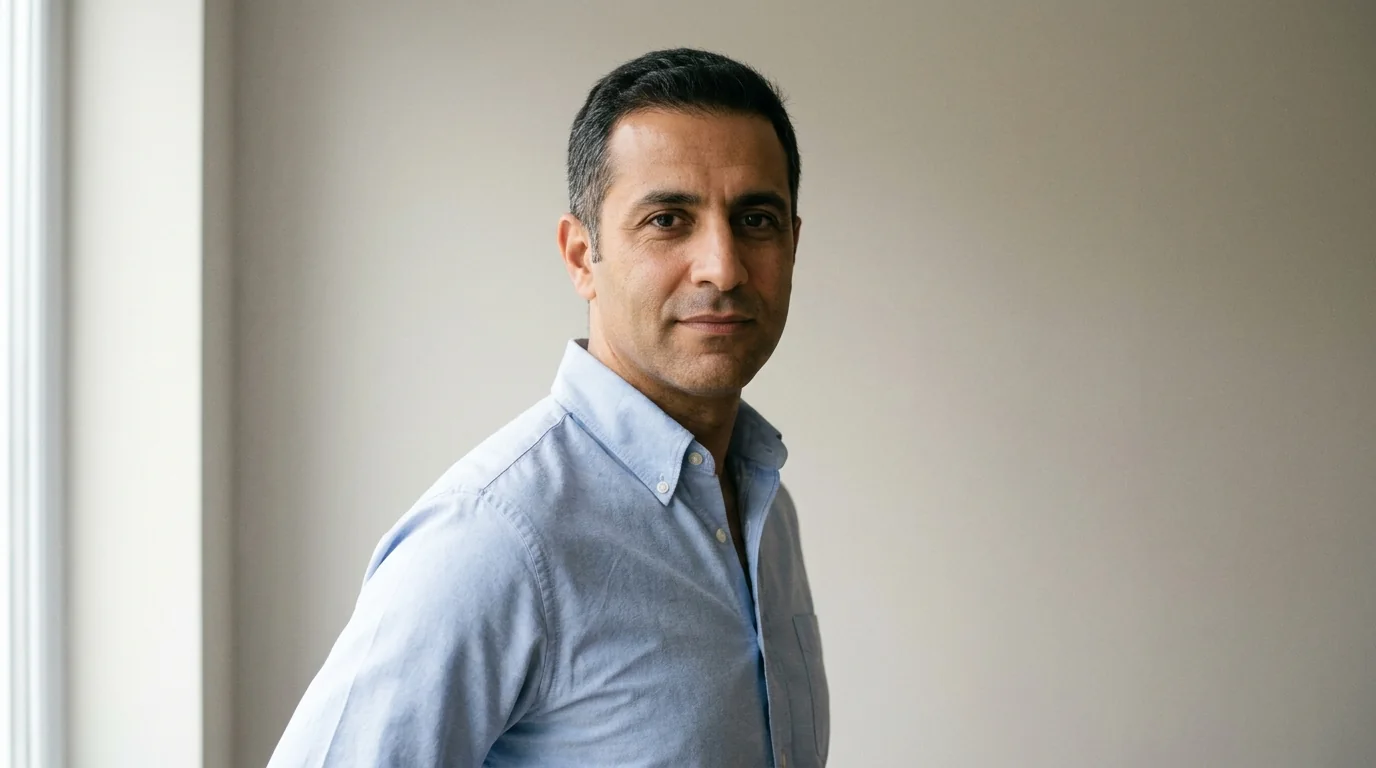
Turning the body about forty-five degrees away from the camera narrows the silhouette, drops one shoulder behind the other and creates a diagonal line through the frame. That diagonal is what makes a portrait look composed rather than documented, and it costs nothing to produce.
The direction matters less than the consistency. Turning left or right is a preference, and most people have a side that feels and photographs better. Try both and keep the one where the jaw line and the eye on the near side look clearer.
#Ninety degrees
A full ninety-degree turn gives a profile, which is a different photograph rather than a variation on a headshot. It removes one eye, flattens the expression and turns the face into a shape. It works for editorial, artistic and character portraits and it is usually wrong for LinkedIn, a résumé or a dating profile, where the viewer needs to see both eyes.
The useful middle ground is a body at ninety degrees with the head turned back towards the lens. The silhouette is narrow, the face is nearly full and the neck shows a slight turn. It is harder to hold comfortably than a forty-five, which is why it tends to be a deliberate choice rather than a default.
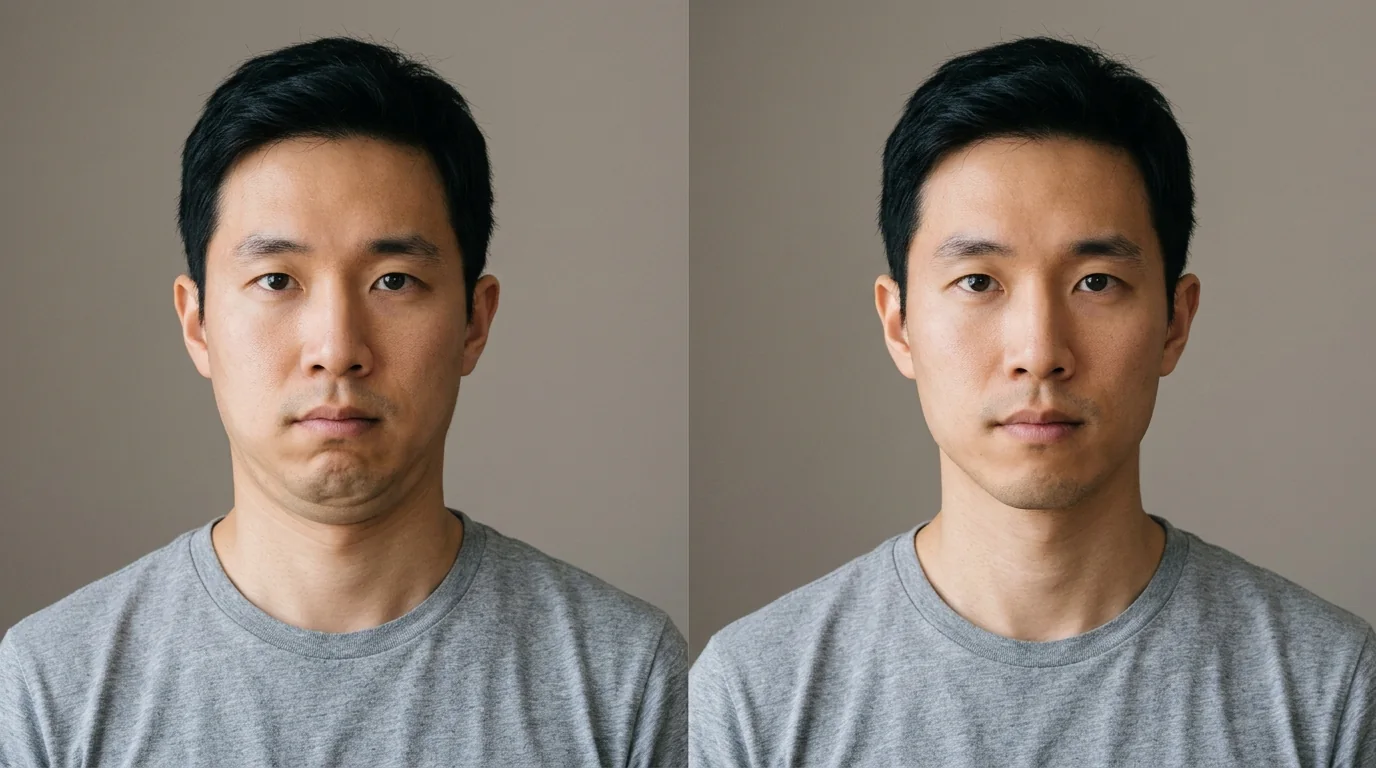
#The Chin and Jaw
#Chin down, eyes up
Dropping the chin a few degrees tightens the skin under the jaw and defines the jaw line. Raising the eyes back to the lens then keeps the subject connected to the viewer instead of looking down at the floor. The combination is the single most reliable fix for a soft jaw in a headshot, and it requires no equipment.
The amount is small. Two or three degrees is enough to change the line under the chin without changing the expression. If the subject has to strain to keep their eyes up, the chin has gone too far.
#The jaw-forward move
The move that solves most double-chin photographs is not a chin tuck but a forward shift: the whole head moves towards the camera, the back of the neck stays long and the forehead tips very slightly down. That keeps the skin under the jaw taut instead of folding it, and it is a different instruction from "put your chin down", which most people interpret as pulling the head backwards.
Try it in a mirror. Pulling the chin back creates the fold; pushing the head forward removes it. The difference is visible immediately, and it is the reason some people look better in candid photographs than in posed ones - they lean in.
#Lengthening the neck
A long neck is mostly a matter of posture, not anatomy. Rolling the shoulders back and down, and lifting the crown of the head as if a string were pulling it upwards, adds visual length without tilting anything. A shirt collar that sits away from the neck helps; a tight collar that presses into the skin does the opposite.
For subjects with a short neck, a slightly higher camera and a lower collar line both help more than any amount of chin adjustment.
#What not to do
Three instructions reliably make a portrait worse: "pull your chin in", "tilt your head", and "sit up straight". The first folds the skin under the jaw, the second produces a pose that looks like a stock photo, and the third stiffens the spine and squares the shoulders.
Replace them with directions that produce a visible change: "push your forehead towards me", "drop your left shoulder", "take a breath and let it out". Each one changes something in the frame, and none of them requires the subject to interpret an abstract idea.
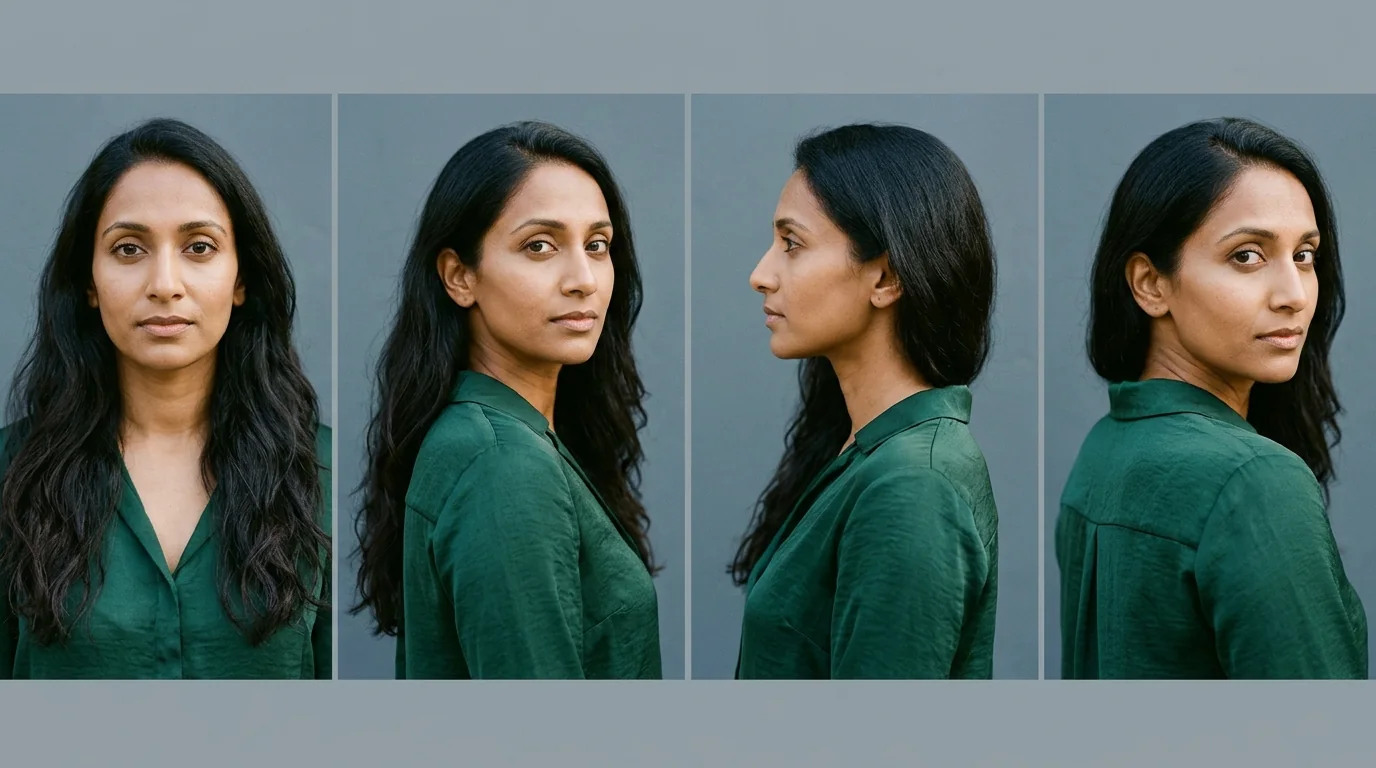
#The Four Classic Angles
#Front-on
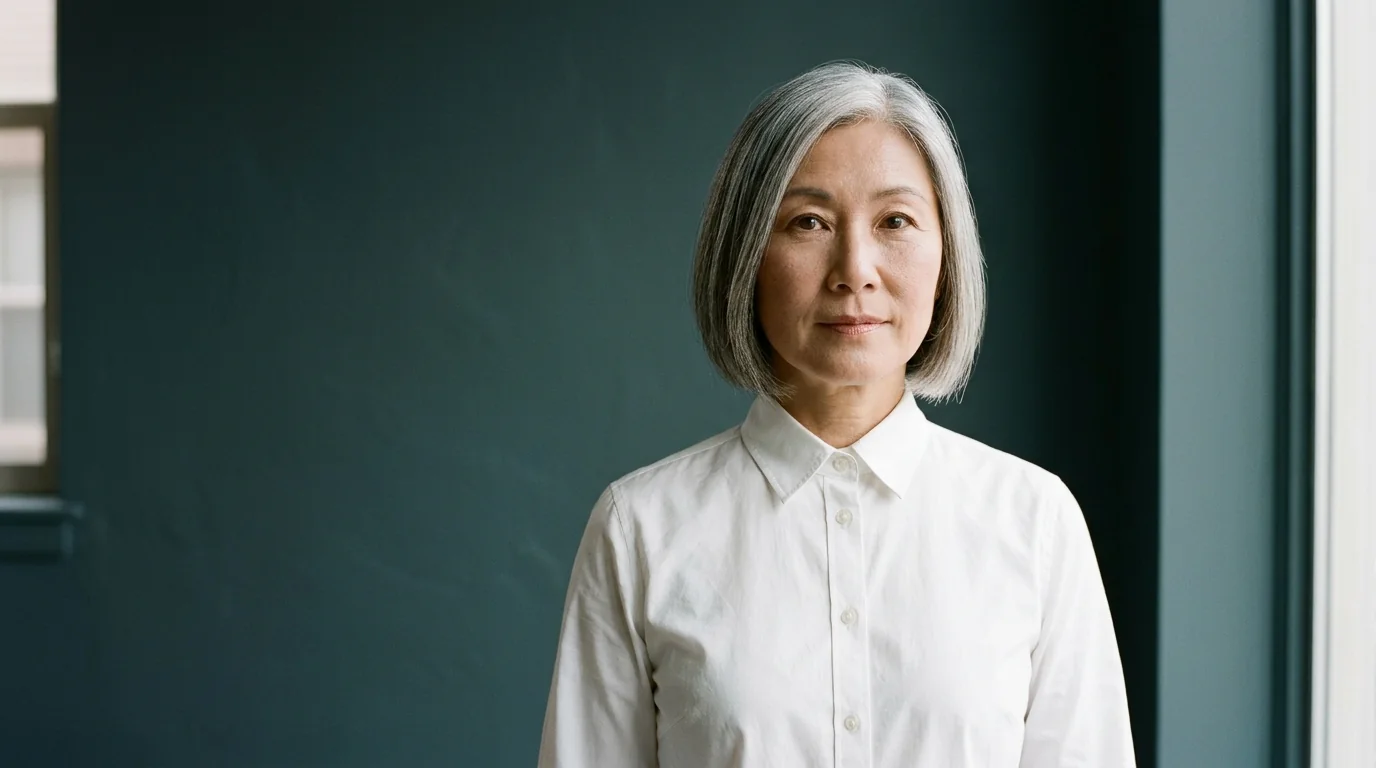
The face is square to the camera, both eyes equidistant from the lens, both sides of the face visible. It is symmetrical, direct and slightly formal, and it works best with a relaxed mouth and an interesting light. Because symmetry is unforgiving, small asymmetries in the face become more noticeable here than at any other angle.
Use it when the brief calls for openness and the subject has a face that carries symmetry well. Avoid it when you want shape, because a front-on headshot has almost no diagonal to work with.
#Three-quarter
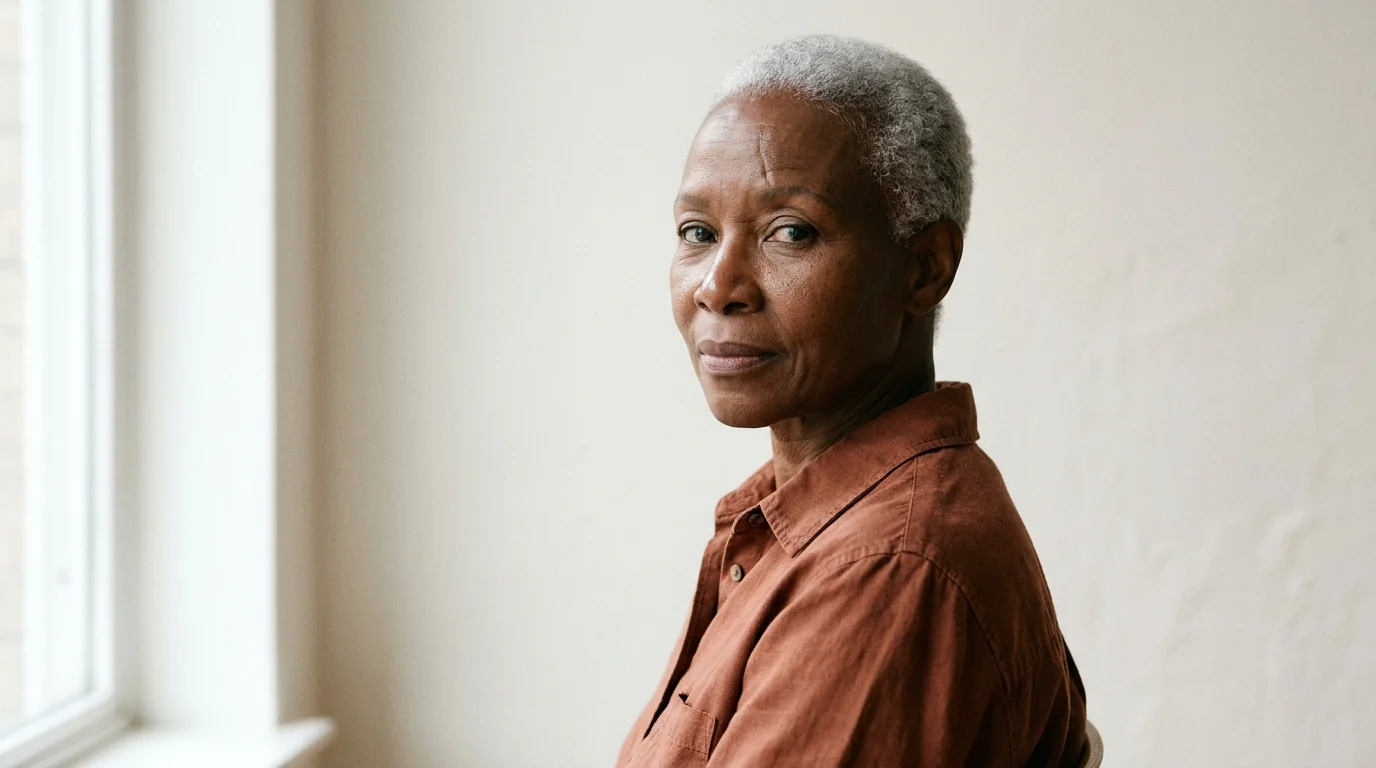
The body turns away, the face turns back, and the camera sees a little more of one side of the face than the other. This is the default headshot angle for good reason: it keeps both eyes visible, gives the nose a direction, creates a jaw line on the near side and leaves the far side with a soft shadow.
Almost every professional portrait you can think of is a variation on this angle. The variations come from how far the body is turned, how far the head turns back and how high the camera sits.
#Profile
The face is at ninety degrees, one eye visible, the outline of the nose, lips and chin doing all the work. A true profile is a silhouette, and a silhouette lives or dies on the outline, so the light usually needs to shape the cheek and jaw rather than flat-fill the face.
Profiles are excellent for editorial and character portraits and poor for anything where the viewer needs to make eye contact. In a set, they work best as one frame among several rather than as the main image.
#Over the shoulder
The subject turns their back partly towards the camera and looks back over one shoulder. It emphasises the shoulder line, narrows the waist visually and produces a direct, engaged gaze from an unusual angle. It is common in editorial, acting and personal-brand portraits.
The risk is the neck twist: a full over-the-shoulder turn strains the neck and shortens it. Turn the body only as far as is comfortable and let the head do the rest, and check that the far eye is still visible in the frame.
| Angle | What the camera sees | Best for | Watch out for |
|---|---|---|---|
| Front-on | Both sides of the face equally | Formal, direct, uniform portraits | Every asymmetry is visible |
| Three-quarter | More of one side than the other | Almost every headshot | Too little turn reads as front-on |
| Profile | One side only, as an outline | Editorial and character portraits | No eye contact, no expression depth |
| Over the shoulder | Shoulder line and a turned gaze | Personal brand and acting portraits | A strained neck and a hidden far eye |
#Hands and Arms
#Hands need a job
Hands are the part of the body most likely to look wrong in a photograph, because they have no expression to fall back on. A hand with nothing to do hangs, clasps or clutches, and all three read as tension. Give the hand a task - resting on a lapel, holding a sleeve, touching a collar - and the fingers relax into something plausible.
For a head-and-shoulders headshot, the simplest solution is to keep the hands out of the frame entirely. A crop that ends above the hands cannot have a hand problem.
#The crossed-arms problem
Crossed arms are the most requested pose and one of the hardest to make look natural. They close the body, hide the shape of the torso and often push the shoulders up towards the ears. When they work, it is because the arms are crossed low, the hands rest on the opposite forearm rather than gripping, and the shoulders stay down.
If a subject asks for crossed arms, take one frame and then take another with the arms open. The open version usually wins, and having both makes the choice obvious.
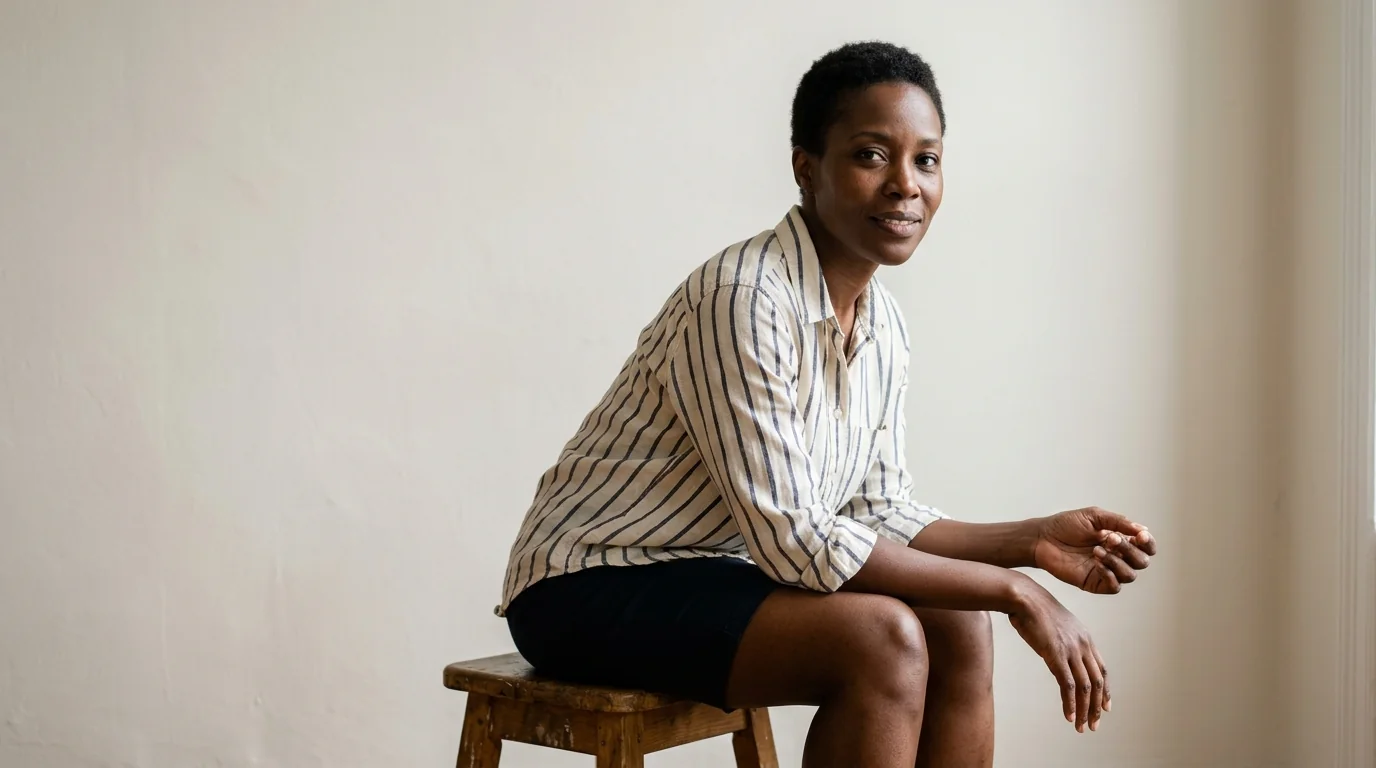
Standing, the hands can rest at the sides with the fingers relaxed, hook into a pocket, or hold a jacket. What they should not do is hang symmetrically with the palms facing backwards, which flattens the arms against the body. Seated, they work best resting on the thighs or on a table edge rather than hanging between the knees.
#Eyes and Expression
#Where to look
For a headshot, the answer is the lens. Not the photographer, not the screen behind the camera, not the preview - the lens, because that is the point the viewer will be looking at. When the subject looks at the photographer's face, the eyes in the photograph point slightly off-axis and the connection weakens.
The exception is the profile and some editorial work, where looking away is the point. Even then, the direction should be decided rather than accidental.
#The squinch
A squinch is a small narrowing of the lower eyelid, somewhere between a blink and a smile. It softens the eyes, adds a hint of warmth and avoids the wide, unblinking stare that makes people look startled in photographs. It is a technique rather than an expression, and it takes about ten seconds to learn.
The distinction that matters is between narrowing the lower lid and squinting with the brow. The first reads as engagement, the second reads as discomfort or bright light.
#Blinks and the in-between frame
Most people blink in response to a flash, and a blink lands in exactly one frame. The professional habit is to shoot two or three frames of every setup and to expect one of them to be usable.
The same logic applies to expression. The frame between two smiles is often better than either smile, because the muscles have stopped performing and the face has settled. That is why photographers who shoot quickly tend to get more natural results than photographers who ask for a pose and wait.
#Standing, Sitting and Leaning
#Standing
Standing is the most common and the least forgiving. The body has to create its own shape, and any stiffness shows up immediately in the shoulders and the hands. Turning the body, dropping one shoulder and bending one knee are enough to make a standing portrait look like a pose rather than a police lineup.
Give the subject something to do with their weight. "Put your weight on your back foot" is a direction that produces a visible change and requires no interpretation.
#Sitting
Sitting relaxes the lower body and frees the subject to concentrate on the face and hands. It suits headshots and half-length portraits, and it is easier for people who feel awkward standing in front of a camera.
The trap is a soft chair. Sinking into it rounds the back, pushes the shoulders up and shortens the neck. A hard stool or the front edge of a chair keeps the posture upright without requiring the subject to hold themselves rigid.
#Leaning
Leaning against a wall or a doorway gives the body a reason to be at an angle, which is exactly what a portrait needs. Lean with the shoulder and the upper back rather than the whole side of the body, keep the hips away from the wall and let the head come forward.
The mistake is leaning back, which pushes the chin up and the chest out. A lean should bring the subject towards the camera, not away from it.
#Posing Different Bodies
#Shorter subjects
A camera at eye level for a shorter subject can make them look up at the lens, which enlarges the whites of the eyes and tilts the head back. Lower the camera to their eye level and, if anything, place it a few centimetres above rather than below. Never solve a height difference by having the subject look up at a camera held at chest height.
Standing portraits of shorter subjects also benefit from a slightly wider frame and a longer lens, so the camera can be further away without the subject filling less of the frame.
#Broader shoulders
Broad shoulders photograph well at an angle, because the turn reduces the width the camera sees. Square them to the lens and the frame is dominated by the shoulder line. A three-quarter turn with the near shoulder slightly forward keeps the shoulders impressive rather than overwhelming.
The same logic applies to anyone who wants to look narrower in the frame: turn, do not lean.
#Seated and wheelchair portraits
A seated portrait is a portrait, not a compromise. The camera comes down to the subject's eye level, which usually means sitting rather than standing behind the tripod, and the chair is positioned at an angle to the lens rather than square to it.
Hands can rest on the armrests or in the lap with the fingers relaxed. The one thing to avoid is the camera looking down from standing height, which makes every seated subject look smaller than they are and flattens the face.
#Posing for Video and AI
#Video calls
On a call, the camera is usually below the face and the pose is whatever the chair produces. The fix is mechanical: raise the laptop until the camera is at eye level, sit forward so the shoulders are not against the backrest, and turn the chair slightly so the body is not square to the lens.
Nothing else matters as much. A good camera angle with a bad light beats a good light with a camera pointing up your nose, and it costs a book under the laptop.
#AI input photos
A generative model reproduces the pose it is given, and it reconciles every frame in the set. If half your photos are front-on and half are turned, the output will drift towards a generic, slightly stiff compromise. Consistency of angle and expression matters more than the pose itself.
The practical recipe is the same three-quarter pose in every photo, the camera at eye level, the same expression, and enough variation in the background and clothing to prove the same person. Poses that are extreme - a strong profile, a dramatic tilt - are harder for the model to reconcile and usually produce a less convincing result.
#Posing Other People
#Direction that works
Most people cannot follow an abstract instruction. "Look natural" and "relax" are not directions; they describe a result the subject cannot consciously produce. Physical instructions work because they are checkable: turn your left shoulder towards me, drop your chin, put your weight on your back foot.
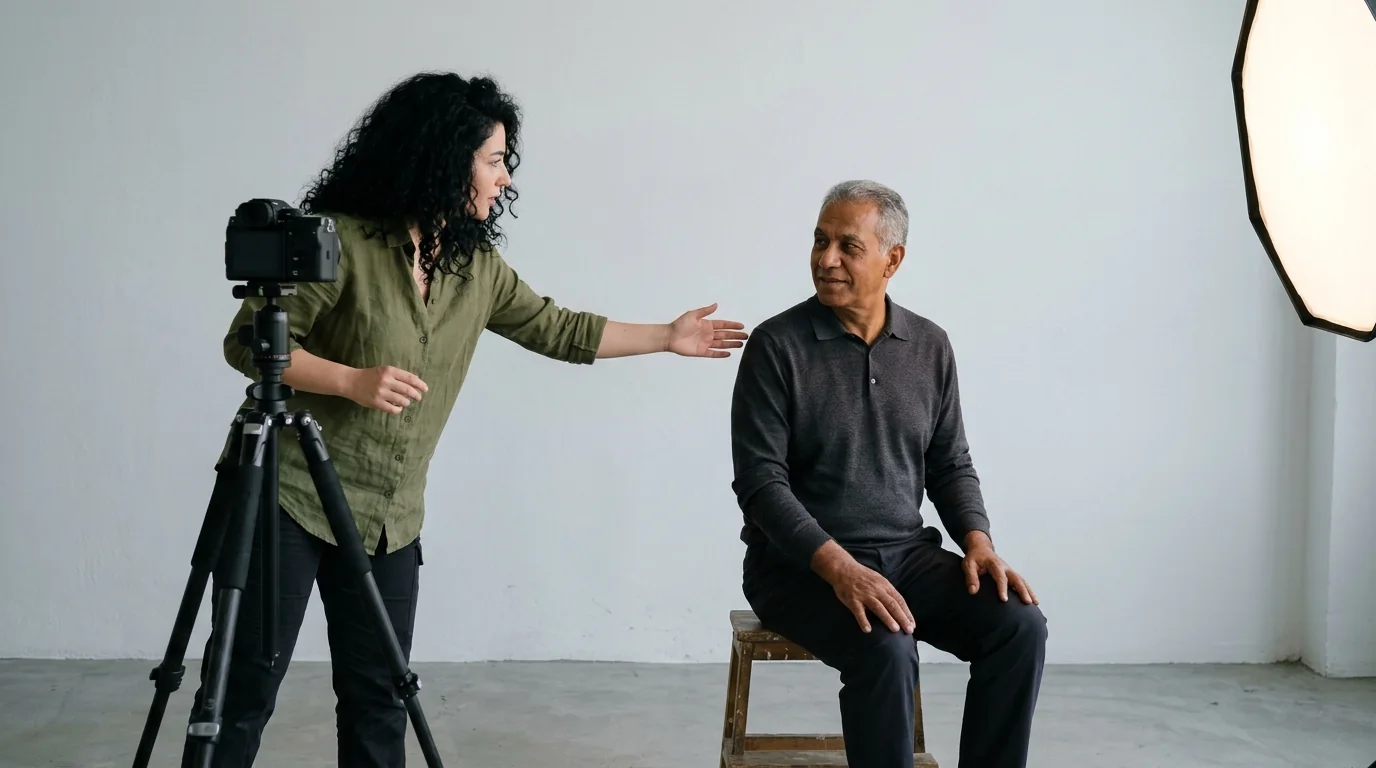
Demonstrate rather than describe. If you want a shoulder dropped, drop your own. If you want a chin down, show the movement. People copy what they see far more accurately than what they hear.
#The three-word vocabulary
Keep a small set of directions that you use every time, so the shoot has a rhythm and the subject learns the language quickly. Something like "turn", "drop", "chin" covers most of what a headshot needs, and each one is a physical action rather than a comment on how the person looks.
Avoid correcting with negatives. "Don't look stiff" tells the subject that they look stiff and gives them nothing to do about it. "Turn your right shoulder back" gives them a movement, and the stiffness often disappears as a side effect.
#Common Posing Mistakes
#Six things that make a portrait stiff
- Square shoulders and a level head. Symmetry reads as a passport photo, not a portrait.
- Chin pulled backwards. It folds the skin under the jaw and shortens the neck.
- Hands clasped in front of the chest. It hides the silhouette and looks defensive.
- Camera below eye level. It widens the jaw and looks up the nostrils.
- Holding a pose for too long. The muscles lock and the face stops moving.
- A smile that does not reach the eyes. The mouth performs while the eyes stay flat, and the result reads as insincere.
#Why "relax" never works
Relaxation is not a movement, so it cannot be performed on request. The subjects who look relaxed in photographs are usually the ones who were given something to do - a physical instruction, a question to answer, a movement to repeat - and who forgot to be self-conscious while doing it.
The practical substitute for "relax" is a task. Ask them to shift their weight, to look at a point on the wall and back, to take a breath and let it out before the frame. The shoulders drop on their own, and the photograph stops looking like a negotiation.
#A Two-Minute Posing Check
#Five tests
- Check the eyes. Both should be visible and looking at the lens, with the camera at their level.
- Check the jaw. Run your eye along the line under the chin. If it folds, the head needs to come forward.
- Check the shoulders. One should be lower or further back than the other, never perfectly level.
- Check the hands. If they are in frame, they should be doing something; if not, crop them out.
- Check the silhouette. Squint at the frame. If the body reads as a rectangle, the pose has not happened yet.
#What to fix first
Fix the camera height before the pose, because a bad angle cannot be rescued by good posture. Then fix the body angle, because it decides the silhouette. Then the chin. The hands and the expression come last, and they matter least in a head-and-shoulders crop.
In practice, the sequence takes about two minutes and removes most of the reasons a headshot looks like a photograph of someone rather than a photograph of a person.
#Frequently Asked Questions
#How should I pose for a headshot?
Turn your body about forty-five degrees away from the camera, then turn your head back towards the lens. Drop your chin a few degrees and push your forehead slightly forward and down, as if you were about to nod. Keep your shoulders relaxed and one of them slightly lower than the other. That single setup, with the camera at eye level, produces a natural, confident headshot without any special skill from the person being photographed.
#Where should the camera be for a headshot?
At or very slightly above the subject's eye level, pointed straight at the face rather than tilted up or down. A camera below eye level looks up the nostrils, widens the jaw and makes the subject appear to be looming. A camera well above eye level flattens the forehead and enlarges the top of the head. A few centimetres above the eyes, with the lens level rather than angled, is the neutral default that flatters almost everyone.
#Should I turn my body or my face?
Both, in that order. Turn the body first, then turn the head back so the face is closer to the camera than the shoulders. The body angle creates the shape of the silhouette and narrows the frame, while the head turn brings the eyes back to the viewer. If you only turn the head, the neck twists and the shoulders stay flat. If you only turn the body, the subject ends up in profile and loses eye contact with the lens.
#Should I tilt my head in a headshot?
A very small tilt, of a couple of degrees, can soften a portrait and make it feel less formal. A large tilt reads as a pose rather than a portrait, and it can make the neck look strained. The safer move is to keep the head level and tilt the shoulders instead, or to drop one shoulder slightly. Any tilt should be a decision you can see in the frame, not a habit the subject brings to every photograph.
#How do I avoid a double chin in a headshot?
Push your forehead slightly forward and down towards the camera, keeping the back of the neck long, rather than pulling your chin backwards. Then raise your eyes to the lens instead of dropping them. Pulling the chin back is what creates the fold under the jaw; moving the whole head forward keeps the jaw line taut. The camera being at eye level rather than below it also removes most of the problem before you pose at all.
#What do I do with my hands in a headshot?
Give them a job. A hand resting on a collar, holding a jacket lapel, or lightly touching a wrist keeps the fingers occupied and prevents the stiff, symmetrical hanging that reads as nervousness. For a head-and-shoulders crop, hands are often best left out of the frame entirely, or crossed low and relaxed at the waist. The worst option is hands clasped in front of the chest, which hides the shoulders and makes the pose look defensive.
#Should I smile with teeth or without in a headshot?
It depends on the role the photo has to do. A closed-mouth smile reads as calm, competent and credible, which is why it dominates corporate and LinkedIn headshots. A teeth-showing smile reads as warm and approachable, and suits client-facing, creative and personal-brand work. Whatever you choose, the eyes have to participate: a wide mouth with flat eyes looks insincere, and most people can feel that in a photograph even if they cannot say why.
#Where should I look in a headshot?
Straight into the lens for almost every professional headshot, with your eyes on the same level as the camera rather than looking down at it or up at it. For a three-quarter or profile angle, look towards the camera rather than at the photographer standing behind it. Looking slightly off-camera can work for editorial portraits, but it weakens the direct engagement that makes a profile photo feel like a person rather than an illustration.
#How do I look natural in photos instead of stiff?
Move between frames rather than holding a pose, and let the photographer shoot while you are still moving. Stiffness comes from freezing in a position you were told to hold; movement keeps the shoulders and jaw loose and produces the small variations that make a set of photos look alive. Small physical instructions, such as shifting weight or taking a breath before the frame, work better than being told to relax, because relaxing on command is not something most people can do.
#What is the best pose for a LinkedIn photo?
A three-quarter body angle with the head turned back to the lens, camera at eye level, shoulders relaxed and one slightly lower than the other, and a calm closed-mouth expression. LinkedIn crops the image into a small circle, so the pose has to read at a hundred pixels: a clear silhouette, the face large in the frame and nothing competing near the shoulders. Anything more dramatic than that gets lost in the crop.
#How should I stand for a full-length portrait?
Stand with your weight on the back foot, the front knee slightly bent and the body turned about forty-five degrees from the camera. Keep the feet close together rather than wide apart, and let one shoulder drop. A full-length pose is a longer version of a headshot pose, not a different discipline: the same rules about angles, hands and head position apply, they are simply visible all the way down the body.
#What pose works best for an AI headshot?
The same neutral pose that works for a real headshot: three-quarter body angle, head turned back to the lens, camera at eye level and a relaxed, consistent expression. Consistency across the uploaded photos matters more than the pose itself, because the model learns your face from every frame. Keep the angle and the expression similar from photo to photo, and avoid extreme tilts or dramatic poses that the model will have to reconcile.
#The Bottom Line
Posing is the part of a headshot that people think is about confidence and is actually about geometry. Turn the body, turn the head back, drop the chin a little and push the forehead towards the lens. Put the camera at eye level. Give the hands something to do or crop them out. That is the entire technical content of most good headshots, and none of it depends on the subject being photogenic.
The difference between a stiff portrait and a natural one is usually movement. A pose held for ten seconds hardens; a pose caught in the middle of a shift looks alive. That is why the best direction you can give is not a pose at all, but a small physical action, repeated until the frame catches the moment between two of them.
If you are building the portrait itself, our headshot generator works from photos you upload. For the rest of the setup, headshot lighting decides how the angles read, headshot backgrounds decide what surrounds the silhouette, and what to wear for a headshot decides the shape under the shoulders.
#Methodology and Sources
This guide separates three kinds of statement:
- Published: a named photographic or reference source.
- Practical: a technique from portrait practice, labelled where it is judgement rather than measurement.
- Opinion: a recommendation from this team, such as the preference for three-quarter angles over front-on poses.
Sources checked on 12 November 2026:
- Wikipedia, Portrait photography. The conventions of portrait framing, including the three-quarter view and the relationship between camera position and perspective.
- Wikipedia, Headshot. The definition of a headshot and its use in professional and editorial contexts.
- Digital Photography School, Posing Tips for Portraits. Practical direction on body angles, hands and the small adjustments that change a portrait.
- Peter Hurley, peterhurley.com. The portrait photographer associated with the "squinch", the small lower-eyelid narrowing described in the expression section.
- Wikipedia, Facial expression. Background on how expressions are read, including the role of the eyes in judgements of sincerity.
The angle names are conventions rather than measurements: "three-quarter" describes a body turned away with the face turned back, not a specific number of degrees. The claim that a pose held too long hardens is a practical observation from portrait sessions, not a measured finding. Statements about how a camera, a webcam or a generative model respond to pose describe the behaviour of those tools, not the appearance of a specific person.
#Explore Other Nothron Tools
Nothron is not just a headshot generator - it is a complete AI photo studio:
#AI Tools
- Nothron Neural Engine - Sharpen, upscale, and clean up a low-resolution photo
- Nothron Natural Glow - Improve skin tone without making the face look artificial
- Nothron Legacy Touch - Restore an older photo before you rebuild your set
#Photo Editing Tools
- Photo Editor - Adjust brightness, contrast, and background details
- Free Online Image Cropper - Crop to the ratio each app expects
- Free Online Circle Cropper - Preview how a photo reads as a circular avatar
#Dashboard Tools
- Nothron Neural Headshot Generator - Create dating and professional portraits with AI
- Dashboard Neural Engine - Advanced AI photo enhancement
- Dashboard Natural Glow - AI-powered skin tone enhancement
- Dashboard Legacy Touch - AI old photo restoration
#Other Blog Posts
- Headshot Lighting in 2026 - Position, size and colour of the light on a face
- Headshot Backgrounds in 2026 - Colour, depth and settings behind the face
- What to Wear for a Headshot - Colour, collars and fabric that survive a camera
- Should You Smile in Your Headshot? - What an expression changes before the pose does
- How to Take Photos for an AI Headshot Generator - The 10-15 photo checklist
- Professional Headshot Guide by Profession - What each industry expects
#Author Biography
Nothron Team is a group of AI and photo editing experts dedicated to building the best AI headshot generator and photo editing platform. With years of experience in AI technology, computer vision, and professional photography, we built Nothron as a platform where anyone can create studio-quality portraits. Our mission is to make professional photo editing accessible to everyone through advanced AI technology.
Nothron Team
The Nothron team turns experience in AI, computer vision and professional photography into a photo studio that anyone can use.