
Headshot Lighting in 2026: How to Light a Face With One Lamp or One Window
A practical guide to headshot lighting in 2026: why light decides more than the camera, the one-light setup that works anywhere, window light, hard versus soft light, short, broad, butterfly and split lighting patterns, fill and reflectors, rim light, lighting the backdrop, colour temperature, glasses and deep skin tones, video calls, common mistakes, a ten-minute lighting check and what an AI headshot generator needs from your input photos.
ON THIS PAGE
#The Short Answer
| Setup | Best for | Watch out for |
|---|---|---|
| One lamp at 45 degrees, slightly above the eyes | Almost everything, at home or in an office | A bare bulb gives hard shadows and harsh skin texture |
| A window with a sheer curtain | The best free soft light most people own | Direct sun through the glass and a blown-out view |
| One softbox or a diffused LED panel | Repeatable results, teams and frequent shooting | A small softbox used far away behaves like a hard light |
| Two lights, key and fill | Any face that needs a gentler shadow side | Two lights of similar strength cancel the shape of the face |
| Key plus rim light | Dark hair, dark clothing, dark backdrops | A rim light that is too strong turns into a halo |
| Reflector or white wall on the shadow side | Lifting the shadow without extra gear | Filling so much that the face goes flat |
| Bounced flash off a white ceiling | Fast, portable, event and conference portraits | A coloured ceiling or a low ceiling casts shadows down |
| Ring light on axis | Even, shadowless beauty and call lighting | Flat lighting, a visible ring in the eye and a halo on the backdrop |
| Existing room light only | Quick reference and video calls | Mixed colour, overhead shadows and no direction at all |
The rest of this article explains each row, what to do when the gear is wrong, and the situations where the safe answer is the wrong one.
#Why Light Decides Everything Else
#A camera records contrast, not objects
A photograph is not a record of what was in front of the lens. It is a record of how much light came back from each surface, flattened onto a sensor with a limited range. Two photographs of the same face with the same lens at the same distance can look like two different people, because the light decides which planes of the face are bright, which are dark and where the edges between them fall. Change the light and you change the shape.
This is why a new camera rarely fixes a bad headshot. The camera affects resolution, colour and noise; the light affects whether the face reads as a face at all. A phone in good light will beat a full-frame camera under a ceiling fixture, every time, and not by a small margin.
#The face needs one clear bright side
Human beings read faces by their shading. The brow ridge, the nose, the cheekbone and the jaw all cast small shadows even in flat light, and those shadows are how the eye reconstructs depth. When light comes from two sides at equal strength, those shadows vanish, the face flattens, and a three-dimensional head looks like a cut-out pasted onto the picture.
So the goal of headshot lighting is not even illumination. It is one clearly lit side, one clearly shaded side, and a transition between them that follows the form of the face. Everything else in this guide, from the position of the key light to the colour of the fill, is a variation on that single idea.
That is also why the two most common headshot failures are opposites of each other: a light too far away, which flattens everything, and a light coming from directly overhead, which carves shadows in the wrong places.
#The One-Light Setup That Works Anywhere
#Put the light at 45 degrees and slightly above the eyes
Stand facing the camera. Now imagine a line from your nose to the lens. Put the light about forty-five degrees off that line, on one side, and raise it until the bulb or the centre of the panel is a little above the height of your eyes. This is the standard key light position, and it has survived a century of portrait photography because it does several things at once: it lights the forehead and the near cheek, it leaves a soft shadow under the nose and along the jaw, it puts a catchlight in the near eye, and it gives the far side of the face enough shadow to create shape.
The exact angle is a preference. At thirty degrees the light is safe and flattering. At sixty degrees the shadow side deepens and the portrait becomes more dramatic. Past ninety degrees, the light starts to skim across the face and you are in split lighting territory, which is a deliberate choice rather than a default.
Height matters as much as the angle. A light level with the chin pushes shadows upward and looks unnatural. A light level with the eyes is neutral. A light well above the head, which is what a ceiling fixture gives you, drops the brow shadow onto the eye socket and hollows the face.
#The size of the light matters more than its power
Softness is not a property of a lamp. It is a property of the angle the light subtends from the subject's position. A large source close to the face makes a wide, gradual transition between highlight and shadow, which is what people call soft light. The same source moved across the room becomes a small point relative to the face, and the transition becomes a hard edge.
That is why a fifty-watt panel with a large diffuser can look softer than a five-hundred-watt bare bulb. When you are choosing equipment, choose the biggest diffuser you can place close to the face; when you are choosing settings, remember that turning the power up does not make the light softer, it only makes the exposure brighter.
#Distance controls the falloff
Light falls off with distance, which means the closer the source is to the face, the faster the brightness drops from the near cheek to the far cheek, and the faster it drops from the face to the wall behind. That has two consequences worth knowing.
First, a close light gives a more sculpted face and a darker background, because the wall is much further from the source than the nose is. Second, a close light is softer, because it subtends a wider angle. Those two effects pull in opposite directions from what most people expect: moving the light closer makes the picture both softer and more contrasty at the same time. It is the single most useful control you have with one lamp.
#The background is the second light
The wall behind you is lit by the same source as your face, and that is usually the problem. If the light is close to you, the wall falls dark and the portrait separates naturally. If the light is far away, the wall receives almost as much light as you do, and the picture goes flat because everything is the same brightness.
The fix costs nothing: move the subject further from the wall, or move the light closer to the subject. Either change increases the difference in brightness between the face and the background, which is what separation means in practice. Adding a second light to the backdrop is the studio solution to the same problem, and it is covered further down.
#Window Light: The Free Softbox
#Which window to choose
A north-facing window in the northern hemisphere, or any window that never receives direct sun, gives the most reliable light: bright, soft and consistent through the day. A window that takes direct sun is usable, but only when the sun is not actually in it, or when a sheer curtain diffuses the beam.
The size of the window matters more than its orientation. A large window is a large source, and a large source close to the subject is soft. A small window works too, if you stand close to it, because proximity increases the angle it subtends. What you want to avoid is a window so far away that it behaves like a point of light, which is what happens when you shoot from across a large room.
#Where to stand
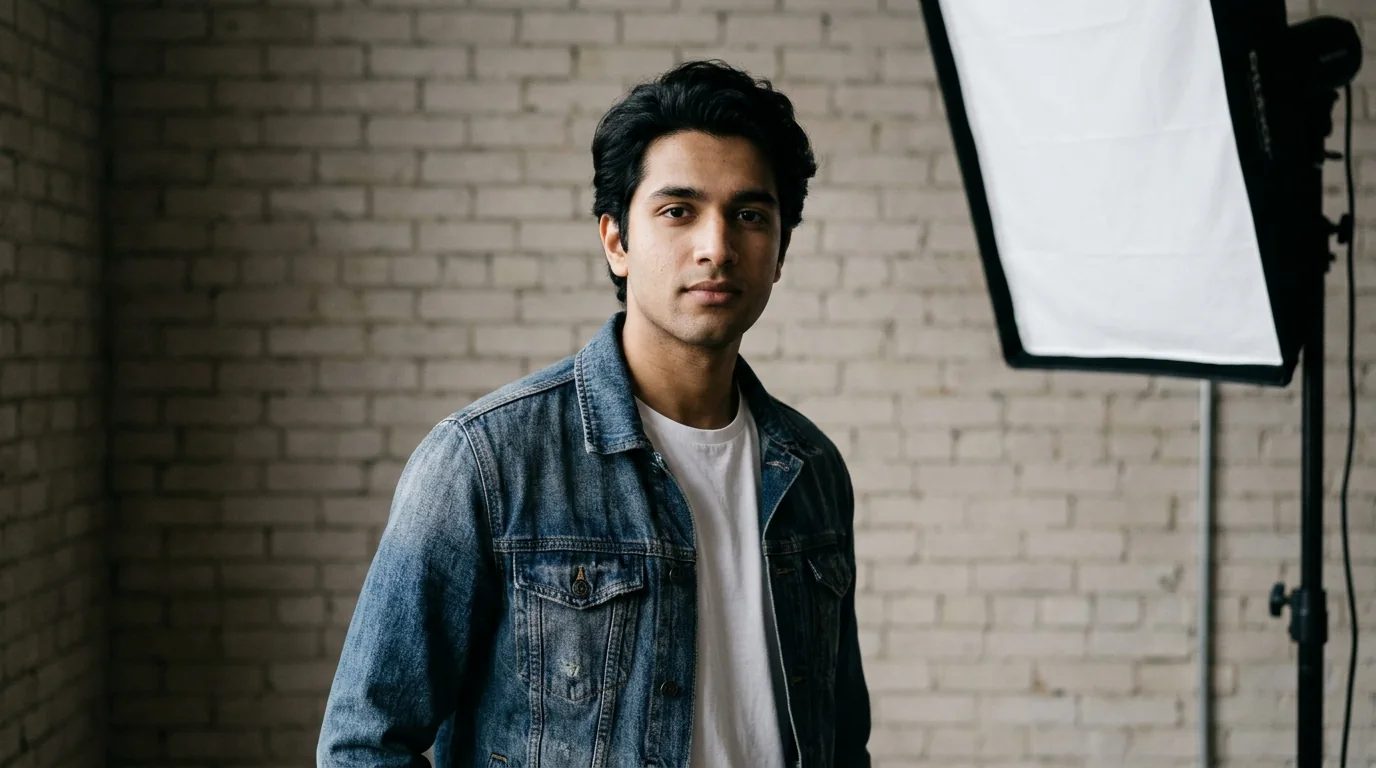
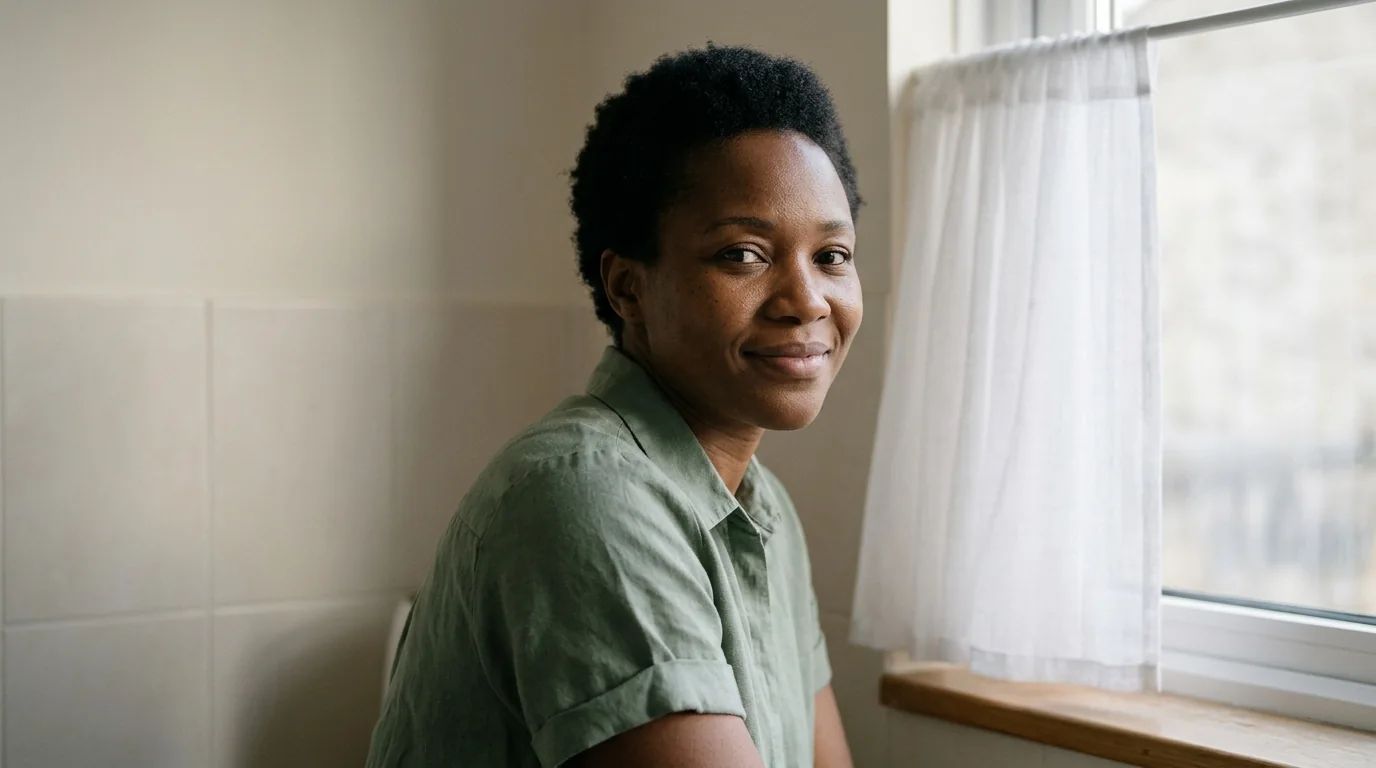
Do not face the window squarely. That is the beginner's move, and it produces exactly the flat, shadowless light that removes the shape of the face. Turn about forty-five degrees so the window is at your side, and then turn your head back towards the camera so the light rakes across the face.
If the window is on your left, your left cheek is lit and your right cheek falls into shadow. The camera is in front of you. That single arrangement, with no equipment at all, gives you the same geometry as a key light - and it is how most of the best natural-light headshots in the world are made.
#Taming a bright window
A window is not always the right brightness. On a bright day it can be two or three stops brighter than the room, which blows out the view and leaves the face correctly exposed against a white rectangle. On a dull day it can be too dim for a sharp photo at a reasonable ISO.
The practical answers are simple. On a bright day, pull a sheer curtain across the glass, or hang a white sheet, or move the subject further from the window until the face is exposed correctly. On a dull day, move the subject closer to the glass, open the aperture, and accept a slightly slower shutter speed with the camera braced. What you should not do is turn on the room lights to compensate, because that adds a second colour and a second direction, and the window stops being the only light.
#Hard Light and Soft Light
#What actually makes light soft
Softness is a relationship, not a category. A source is soft when its apparent size is large relative to the subject: the sun is enormous and looks hard because it is ninety-three million miles away and subtends a tiny angle; a softbox is small and looks soft because it is a metre from a face. Move the softbox to the far end of a hall and it becomes hard, without changing a single setting.
The practical test is the shadow edge. A soft source produces a gradual transition from light to dark, sometimes across several centimetres of skin. A hard source produces a line you could trace with a pen. The same face lit both ways looks like two different portraits, and the difference is entirely geometric.
#When hard light works
Hard light is not a mistake, it is a style. It gives graphic shadows, strong specular highlights and a sense of energy that soft light cannot produce. It suits editorial portraits, musicians, athletes and anyone whose image benefits from edge rather than calm.
It is also the light most people accidentally get, because a bare bulb, a phone flash or the sun through a window are all hard sources. The difference between an accidental hard portrait and a deliberate one is control: the shadow edge should fall where you decided it should fall, not across the eye.
#How to soften a hard source at home
Diffusion is the whole technique. Put something translucent between the source and the face: a sheet of tracing paper, a white shower curtain, a stretched cotton sheet, a sheet of diffusion gel if you own one. The closer the diffusion is to the source, the less it spreads the light; the closer it is to the subject, the more it softens.
There is a second, less obvious trick: bounce instead of diffuse. Aim the light at a white wall or a white board and let the reflected light do the work. A bounced flash off a white ceiling is a large, soft source for the price of nothing, which is why event photographers use that technique in rooms with no equipment at all.
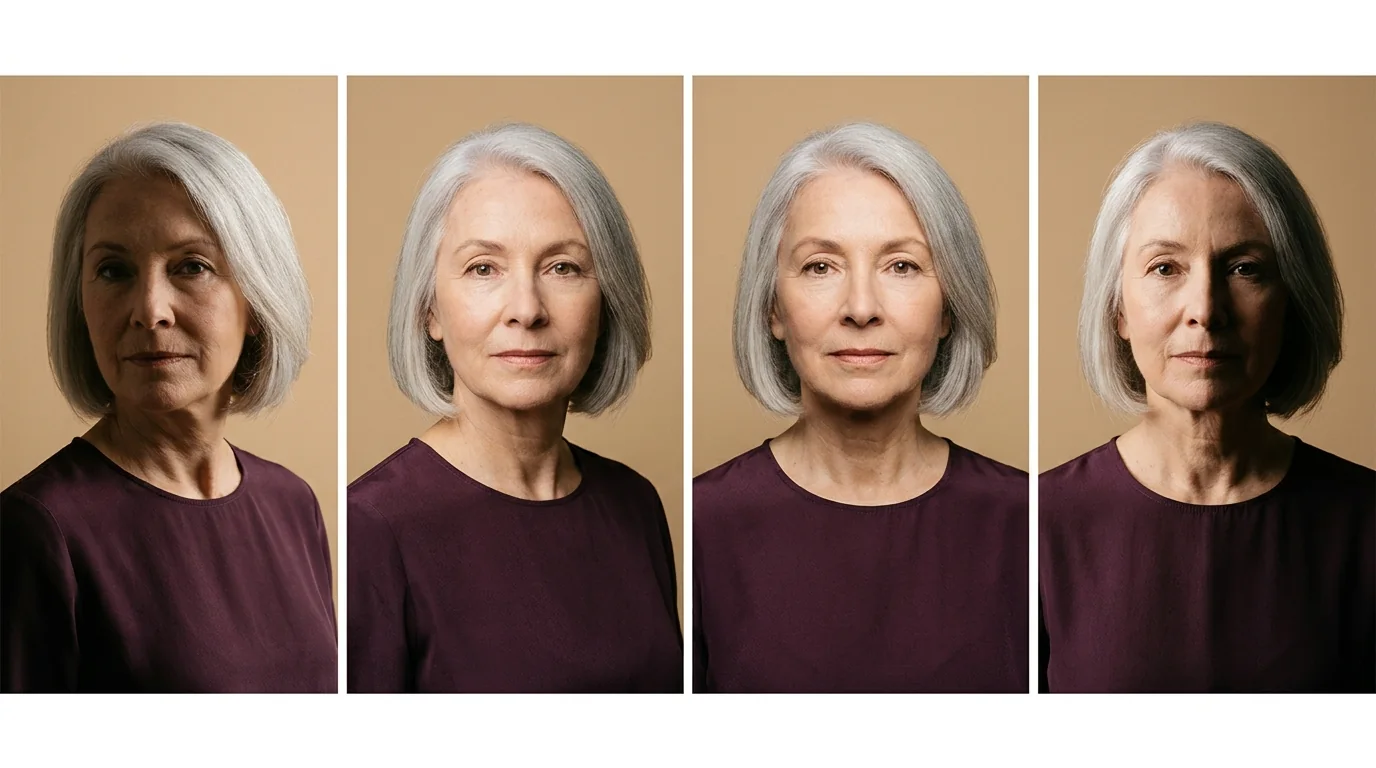
#Four Lighting Patterns Worth Knowing
#Short lighting
Short lighting puts the key on the side of the face turned away from the camera. Because the near side is in shadow, the face appears narrower and more defined. It is the default pattern for professional headshots and the reason photographers ask subjects to angle their body away from the lens and then turn their head back.
It flatters most face shapes, including round and square faces, because the shadow does the work of slimming. It also gives the portrait a clear direction, which reads as intentional even to a viewer who knows nothing about lighting.
#Broad lighting
Broad lighting puts the key on the side of the face turned towards the camera. The near side is lit, the far side falls away, and the face reads wider. That is usually described as a disadvantage, and for headshots it often is, but it has legitimate uses: it opens up a narrow face, it softens a very angular bone structure, and it can make a subject look more open and approachable.
The practical rule is to default to short lighting and switch to broad only when the subject has a noticeably narrow face or when the brief calls for warmth over definition.
#Butterfly lighting
Butterfly lighting places the source directly in front of the face and above it, so the nose casts a small symmetrical shadow straight down. It is the classic beauty and glamour pattern: symmetrical, flattering to the cheekbones, and very clean.
The catch is that it is unforgiving of under-eye shadows and of a wide nose, and it flattens the jaw because there is no side shadow to define it. It also needs a fill under the chin, or a reflector, to stop the shadow under the nose becoming a dark triangle. Used badly, it is the pattern that makes a headshot look like a passport photo.
#Split lighting
Split lighting puts the source at ninety degrees to the face, so exactly half is lit and half is dark. It is dramatic, graphic and unmistakably a choice. In a corporate headshot it usually reads as too stylised; in an author photo, a musician's press shot or a creative portfolio it can be exactly right.
What makes split lighting work or fail is the edge. If the transition runs straight down the bridge of the nose, the portrait looks deliberate. If it wanders, or if the eye on the dark side loses its catchlight, it looks like an accident.
| Pattern | Light position | Effect | Use it when |
|---|---|---|---|
| Short | 45 degrees, on the side turned away from the camera | Narrows the face, adds definition | Default for headshots |
| Broad | 45 degrees, on the side turned towards the camera | Widens and opens the face | Narrow faces, warmer portraits |
| Butterfly | In front and above, on the centre line | Symmetrical, cheekbone-focused | Beauty, editorial, clean corporate |
| Split | 90 degrees to the side | Half lit, half dark, graphic | Creative and dramatic portraits |
#Fill and the Shadow Side
#How much shadow to keep
Fill is light added to the shadow side, and the most common mistake is adding too much of it. Fill that equals the key produces flat, shadowless light and wastes the shape you just created. Fill that is absent produces a black side of the face with no detail, which prints badly and looks harsh on a small screen.
The useful range is roughly one to two stops below the key. In practice that means the shadow side is clearly darker, but you can still see the eye, the cheek and the edge of the jaw. If you can read the texture of the skin on the shadow side, you have enough fill. If the shadow side looks like a silhouette, you have too little.
#A white wall is a free reflector
You almost never need to buy a reflector. A white wall a metre from the subject's shoulder bounces enough light to lift the shadow side by a useful amount. A sheet of white foam board, a pale bedsheet, or the back of a large book will do the same job, and a piece of aluminium foil taped to cardboard gives a harder, more directional fill when you need it.
Position matters more than material. Put the bounce opposite the key light, at roughly chest or shoulder height, angled towards the face. Moving it ten centimetres changes the result, so this is one of the few parts of lighting that rewards fiddling.
#Rim Light and Hair Light
#Separating dark hair from a dark background
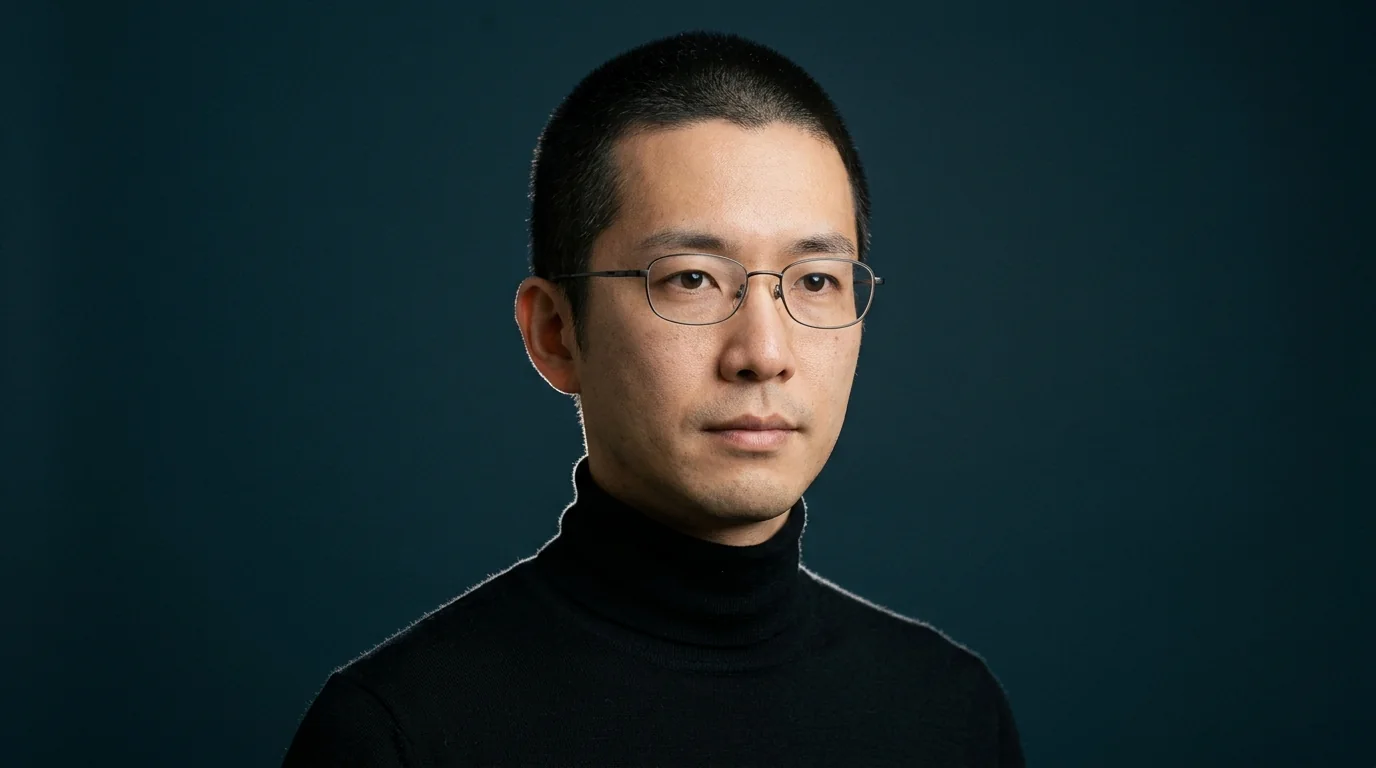
A rim light is a source placed behind and to one side of the subject, aimed at the edge of the head and shoulders. Its purpose is separation: it draws a bright line along the hair and the shoulder so the silhouette does not merge with a dark background. It is the standard fix for dark hair on a dark backdrop, which is otherwise the hardest combination in portrait photography.
The rim should be subtle. If you can see the light source itself, or if the edge glows like a halo, it is too strong. The target is a thin bright edge that appears only on the side away from the key, so the eye reads a complete shape rather than a bright outline.
#Doing it with a second lamp or a bounce
A second lamp behind the subject, flagged so it does not spill onto the lens, is the studio answer. At home, a small lamp placed behind the shoulder and angled towards the back of the head does the job, as long as it does not point at the camera.
If you only have one light, cheat. Move the background light or the wall tone instead: a slightly lighter wall gives the same separation with no second source. Or use the window as the rim and a lamp as the key, which is often easier than it sounds, because a window behind and to the side produces a natural edge on the hair and shoulders.
#Lighting the Backdrop
#Why the backdrop needs its own light
In a studio, the backdrop is treated as a separate subject with its own exposure. If it is lit by the key light alone, it is brightest directly behind the head and falls off towards the edges, which draws the eye to the centre of the frame instead of the face. A dedicated backdrop light puts an even, controllable tone behind the subject.
You can see the difference immediately in a grey backdrop. Unlit, it forms a bright pool behind the head. Lit evenly, it becomes a flat mid-grey surface that lets the subject sit in front of it rather than inside it.
#Getting a gradient instead of a flat wall
A gradient is usually more attractive than a flat tone, and it is easier to achieve than it sounds. Aim a single light at the backdrop from one side, close to the surface, and let it fall off across the width. The result is a soft transition from lighter to darker, which gives depth without any visible object.
The two things that ruin it are a hotspot, where the light is too close or too narrow, and a shadow of the subject, which appears when the backdrop light is positioned behind the person. Move the backdrop light further to the side and angle it along the wall rather than at it.

#Colour Temperature and Mixed Light
#Warm and cool in the same frame
Colour temperature describes how warm or cool a white surface appears under a given source. A tungsten bulb makes white look amber, an overcast sky makes it look blue, and a camera has to pick one of those as "white" or render one of them wrong. That is the whole mechanism behind the orange-and-blue portraits that look like mistakes.
The problem is almost never a single source. It is the mixture. A desk lamp on one side of the face and a window on the other produces two different colours on the same skin, and no amount of editing fixes it cleanly, because the correction you apply to the warm side is wrong for the cool side.
#What 3200 K and 5600 K actually mean
The numbers come from the temperature a black body would need to be heated to in order to glow with that colour. Around 3200 K is the nominal value for a tungsten studio lamp, and 5600 K is the nominal value for daylight, which in standard form is defined as the D55 and D65 illuminants rather than as a single measurement of the sky.
In practice you do not need the numbers. You need to know that most household bulbs are warm, most daylight is cool, and most LED panels let you dial the value. What matters is that every source in the frame is set to the same value, or that only one source is on. That is a decision you make before you shoot, not after.
#Fixing mixed light without a colour meter
The simplest fix is to turn things off. Kill the ceiling light, close the door to the next room, and let one source be the only source. If you need the second light for exposure, put a gel over it, or change the white balance of your camera until the dominant source looks correct and accept that the other one will be off.
If you cannot control the source, move the subject. Two metres away from a warm lamp, the colour cast weakens with distance, because the lamp contributes less light. In a room with a window and a warm bulb, standing near the window and switching the bulb off is usually enough to solve the whole problem.
#Glasses, Deep Skin and the Awkward Subjects
#Stopping reflections in glasses
A lens reflects light at the angle it arrives: the angle of incidence equals the angle of reflection. So the way to remove a reflection from a lens is to move the light out of the reflected path, not to ask the subject to tilt their head further and further.
Lower the light, push it further to the side, or raise it well above the head and let the reflection travel downwards past the lens. A small tilt of the glasses at the temple, a couple of degrees of chin movement, and a slightly wider lens angle all help. A polarising filter reduces glare and saturation in reflections, but it cannot remove a reflection that is pointed straight at the camera.
#Shine on a bald head or a forehead
Specular highlights on skin are a function of the size of the source, not the oiliness of the skin. A small source produces a small, intense hotspot; a large source spreads the same energy across a broad area, which reads as sheen rather than glare. So the fix for a shiny forehead is usually a bigger, closer light, not more powder.
Keep the light slightly off the centre line so the highlight does not land on the crown of the head, and let the shadow side do the work of shaping the skull. If you still need to knock it down, blotting paper is a five-second fix that costs less than a diffuser.
#Lighting deep skin without losing detail
The exposure rule is the same for every skin tone: expose for the brightest area that must hold texture. What changes is where that area is and how much highlight range the skin can show before it clips. Deep skin often carries a broad, even specular sheen across the cheekbones and forehead, and that sheen is the first thing to blow out if you expose for the background instead of the face.
Two practical consequences follow. First, do not underexpose to protect a bright wall behind the subject; change the wall or move the light instead. Second, make sure the shadow side still receives enough fill to show the shape of the cheek and jaw, because deep skin in deep shadow loses the modelling that makes the portrait read as three-dimensional. A rim light helps separate dark hair from a dark backdrop, and it should be gentle rather than theatrical.
#Video Calls, Stills and AI Input
#Why the same setup behaves differently on a webcam
A webcam has a small sensor, a wide lens and an auto-exposure system that averages the whole frame. Point a window at the camera and it exposes for the window, which makes your face a silhouette. Put a lamp behind you and it does the same thing. The light that looked fine in a still can be unusable in a call, because the camera is making a different decision.
The fix is to give the camera an easy frame: one bright thing (your face), a background that is not brighter than you, and no window in shot. That is it. A call does not need shape or modelling; it needs a face that is brighter than everything around it.
#The one change that matters
Move the light in front of you and slightly to the side, and make sure nothing bright is behind you. If you have a ring light, put it off to one side rather than directly on axis, because on-axis light removes every shadow and makes the face look flat and wide.
For stills, the same principle applies but the tolerance is lower: a still is looked at closely, so the shape of the face matters and a single soft source at forty-five degrees beats a ring light every time. The camera on your desk is a starting point, not a standard.
#What an AI headshot generator needs from the light
A generative model learns the light of the photos you give it, and it reproduces that light in every frame it creates. If your input set mixes window light, ceiling light and flash, the model has to reconcile three different directions, and the result is usually a soft, directionless portrait that looks generated rather than photographed.
The recipe is boring and it works: one soft source from the same side, in every photo, with the face evenly exposed and no hard shadow behind the head. Photograph in the same room at the same time of day, keep the background plain, and let the light direction stay constant while you change the pose. Consistency is worth more than drama in an input set.
#Common Lighting Mistakes
#Six things that flatten a face
- The light is too far away. A distant lamp becomes a small source, the shadow edge sharpens, and the wall behind you receives almost the same exposure as your face.
- The light is directly in front. On-axis light removes the shadow under the nose and along the jaw, and the face reads as a flat shape.
- The room light is on. Ceiling fixtures add a second direction and often a second colour, and they drop shadows under the eyes.
- Something bright is behind you. A window, a lamp or a white wall pulls the eye away from the face and, on a webcam, changes the exposure entirely.
- The fill is as strong as the key. Two equal lights cancel the modelling that the key light just created.
- The background is lit as brightly as the subject. Without a difference in brightness there is no separation, and the portrait looks like a snapshot.
#Why more light usually makes it worse
Beginners add light when a photograph looks dull. That is almost always the wrong move, because dullness comes from a lack of direction and contrast, not from a lack of brightness. Adding a second lamp on the other side fills the shadow, removes the shape and produces the exact flatness the person was trying to escape.
The better response to a dull photograph is to move the existing light closer and further to the side, then add fill only if the shadow side has gone completely black. One light in the right place beats three lights in the wrong places, and it takes less time to set up.
#A Ten-Minute Lighting Check
#Five tests before you shoot
- Squint at the frame. If your face is not the brightest and most detailed thing in it, move something.
- Look for the catchlight. A small bright dot in the near eye confirms the key light is reaching the face from the front.
- Check the shadow under the nose. It should fall slightly to one side, not straight down the middle.
- Look at the wall behind the head. If it is as bright as the face, move the subject forward or the light closer.
- Check the shadow side at full size. You should still see the eye, the cheekbone and the jaw, with texture rather than a silhouette.
#What to fix first
If more than one test fails, fix them in this order: direction, distance, fill. Direction decides whether the face has shape at all. Distance decides whether the light is soft and whether the background separates. Fill is the last adjustment, because it only modifies what the first two have already created.
Most home headshots improve dramatically with a single change: move the light from directly in front to forty-five degrees to the side. That is one move, it costs nothing, and it fixes the flattest, most common failure in the whole guide.
#Frequently Asked Questions
#What is the best lighting for a headshot?
One large, soft source placed about forty-five degrees to one side of the face and slightly above eye level, with the far side of the face left in partial shadow. That single arrangement produces a lit side, a shaded side and a readable shape between them, which is what makes a face look three-dimensional. Power matters far less than the size of the source and how close it is to the subject.
#Do I need a softbox to take a good headshot?
No. A softbox is convenient because it is large, close and easy to aim, but a window with a sheer curtain, a white bedsheet stretched over a lamp, or a sheet of tracing paper taped in front of a bulb does the same optical job. What a softbox cannot be replaced by is distance: any source used close to the face becomes softer, and any source moved far away becomes harder and flatter.
#Where should I put the light for a headshot?
At about forty-five degrees to one side, slightly above the height of the eyes, roughly an arm's length or a little more from the face. That position gives a highlight on the forehead and the near cheek, a soft shadow under the nose and jaw, and a catchlight in the eye. Move it further to the side and the shadow deepens into split lighting; move it in front and the face flattens.
#Can I take a well-lit headshot with just a window?
Yes, and for most people a window is the best light they have access to. Stand at an angle to the glass rather than facing it straight on, so the light falls across the face instead of flattening it. Turn off the room lights and the overheads so the window is the only source, and use a white wall or a pale sheet on the far side to lift the shadow without filling it completely.
#Is hard light or soft light better for a headshot?
Soft light is the safer choice for almost every professional headshot, because it wraps around the face and keeps detail in the shadow side. Hard light is not wrong, but it is unforgiving: it emphasises texture, lines and pores, and it produces a shadow edge that has to be placed deliberately. Use soft light when the photo has to work in many contexts, and hard light when you want a graphic, high-contrast portrait and can control the result.
#What is short lighting?
Short lighting means the key light illuminates the side of the face that is turned away from the camera. The near side falls into shadow, so the face narrows and gains definition. It is the standard choice for headshots because it flatters most face shapes and gives the image depth, and it is why the subject is usually angled slightly away from the lens rather than squared to it.
#How do I get rid of shadows under the eyes?
Raise the light or move it closer to eye level, and add a small amount of fill from the front. Shadows under the eyes are usually caused by a source that sits too high, or by light coming from directly overhead, which is what ceiling fixtures do. A white card, a wall or a reflector at chest height, angled up towards the face, lifts the shadow without erasing it.
#How do I light a headshot in a small room?
Use one source, keep it close to the face, and accept the wall as part of the picture. In a small room the light bounces off every surface, which fills the shadows more than you want, so turn off extra lamps and let one side go dark. Standing close to the wall is the bigger problem: move the subject a metre forward and the shadow of the body stops appearing behind the shoulder.
#What colour temperature should headshot lighting be?
Any single consistent temperature between roughly 3200 K and 5600 K is fine, as long as everything in the frame matches. Tungsten bulbs near 3200 K read warm and amber, daylight near 5600 K reads neutral to slightly cool. The problem is not the number but the mixture: a warm bulb on one side of the face and a cool window on the other produces a two-colour portrait that looks like a mistake.
#How do I stop my glasses reflecting in a headshot?
Move the light rather than the person. Lower the source slightly, push it further to the side, or raise it so the reflection leaves the lens instead of crossing the pupil. Tilting the glasses down a fraction at the temple helps, and asking the subject to turn their chin down a few degrees often moves the reflection out of the frame entirely. A polarising filter can reduce the glare but it will not remove a reflection that is aimed straight into the lens.
#How should I light a headshot of someone with deep skin?
Light deep skin for the highlights, not for the shadows. A larger source placed closer gives a broad, gentle highlight that shows the natural sheen of the skin without blowing it out, and a slight rim light separates dark hair from a dark background. Avoid underexposing to protect the background, and avoid heavy fill that flattens the shape of the face. Expose so the brightest part of the skin still holds texture, then check the shadow side on the screen rather than guessing.
#How should I light photos for an AI headshot generator?
Use one soft, consistent source from the same side in every photo, with the face evenly exposed and no deep shadow on either cheek. Avoid mixing window light with a ceiling lamp in the same set, and avoid flash that produces a hard shadow behind the head. The model learns the light it is given: a set with one clear direction and even exposure produces cleaner, more consistent generated portraits than a set with dramatic lighting in every frame.
#The Bottom Line
Lighting a headshot is not a gear problem. It is a decision about where one bright thing sits relative to a face, how large that thing appears from where the face is, and how much shadow you allow to remain on the other side.
One soft source at forty-five degrees, slightly above the eyes, close enough to be soft and close enough to make the wall fall away, with a white wall for fill and nothing bright behind the head, will produce a better portrait than a kit of five lights arranged without a decision. Everything else in this guide, from butterfly lighting to colour temperature to the ring light on your desk, is a refinement of that single arrangement.
If you are building the portrait itself, our headshot generator works from photos you upload, and headshot backgrounds is worth reading alongside this guide because the background and the light are the same decision seen from two angles. For the rest of the setup, what to wear for a headshot covers the clothing that has to survive the light, and how to look good on video calls applies the same principles at call quality.
#Methodology and Sources
This guide separates three kinds of statement:
- Published: a named photographic or reference source.
- Practical: a technique from portrait and studio practice, labelled where it is judgement rather than measurement.
- Opinion: a recommendation from this team, such as the preference for forty-five degrees and short lighting over on-axis light.
Sources checked on 11 November 2026:
- Strobist, Lighting 101. The standard primer on small-flash lighting: light position, the effect of distance on falloff, and why a single well-placed source carries most of the work.
- Digital Photography School, How to Use a Reflector. Practical guidance on bouncing light into the shadow side and on how position changes the result more than material.
- Digital Photography School, A Beginner's Guide to Taking Portraits of Elderly Clients: Part 2 - Lighting and Posing. Notes on soft light, short lighting and controlling the shadow side of a face.
- Wikipedia, Key light. The conventional definition of the key light and its role relative to fill and back light.
- Wikipedia, Three-point lighting. The standard key, fill and back arrangement, including the ratios that keep a shadow side readable.
- Wikipedia, Color temperature. The definition of colour temperature, the black-body scale, and the nominal values for tungsten and daylight.
The pattern names are conventions rather than measurements: "short" and "broad" describe which side of the face is lit, not a specific angle in degrees. The one-stop-to-two-stop fill range is a working convention from studio practice, not a laboratory value. Statements about how a camera, a webcam or a generative model respond to light describe the behaviour of those tools, not the appearance of a specific person.
#Explore Other Nothron Tools
Nothron is not just a headshot generator - it is a complete AI photo studio:
#AI Tools
- Nothron Neural Engine - Sharpen, upscale, and clean up a low-resolution photo
- Nothron Natural Glow - Improve skin tone without making the face look artificial
- Nothron Legacy Touch - Restore an older photo before you rebuild your set
#Photo Editing Tools
- Photo Editor - Adjust brightness, contrast, and background details
- Free Online Image Cropper - Crop to the ratio each app expects
- Free Online Circle Cropper - Preview how a photo reads as a circular avatar
#Dashboard Tools
- Nothron Neural Headshot Generator - Create dating and professional portraits with AI
- Dashboard Neural Engine - Advanced AI photo enhancement
- Dashboard Natural Glow - AI-powered skin tone enhancement
- Dashboard Legacy Touch - AI old photo restoration
#Other Blog Posts
- Headshot Backgrounds in 2026 - Colour, depth and settings behind the face
- What to Wear for a Headshot - Colour, collars and fabric that survive a camera
- Should You Smile in Your Headshot? - What an expression changes before the light does
- How to Take Photos for an AI Headshot Generator - The 10-15 photo checklist
- How to Look Good on Video Calls - Camera height, light and framing for the other half of your working image
- Professional Headshot Guide by Profession - What each industry expects
#Author Biography
Nothron Team is a group of AI and photo editing experts dedicated to building the best AI headshot generator and photo editing platform. With years of experience in AI technology, computer vision, and professional photography, we built Nothron as a platform where anyone can create studio-quality portraits. Our mission is to make professional photo editing accessible to everyone through advanced AI technology.
Nothron Team
The Nothron team turns experience in AI, computer vision and professional photography into a photo studio that anyone can use.
Related articles
Headshot Retouching in 2026: How Much Editing Is Still Acceptable
Nov 13, 2026 · 28 min read

Headshot Posing in 2026: Angles, Chin, Shoulders and Hands That Look Natural
Nov 12, 2026 · 28 min read
Headshot Backgrounds in 2026: Colour, Depth and Settings That Look Professional
Nov 10, 2026 · 27 min read